A ripped pet bed can look beyond saving: loose stuffing, split seams, and a flattened corner are hard to ignore. Yet a small tear may need only careful stitching and a washable patch. Learning how to fix a ripped pet bed instead of throwing it away starts with a close inspection. Check the fabric, seams, zipper, and filling. Look for mold, pests, or sharp objects, too. If the bed is heavily contaminated or the inner cushion is breaking apart, replacement may be safer. Repair is useful, but it is not right for every bed.
The U.S. Environmental Protection Agency’s 2018 Advancing Sustainable Materials Management report estimated that Americans generated 17 million tons of textiles and sent about 11.3 million tons to landfills. Those figures cover textiles broadly, not pet beds specifically; they offer context, not proof that every repair prevents waste. Orsola de Castro, a prominent clothing-repair advocate and Fashion Revolution co-founder, has said, “The most sustainable garment is the one already in your wardrobe.” Her words concern clothing, but the reuse principle can also guide a pet-bed repair. This guide focuses on practical choices: matching thread to the fabric, closing a seam with secure stitches, and covering a small hole with a washable patch. Keep repairs smooth. Remove loose threads. Test the bed before your pet uses it. A repair can be imperfect. It should still be clean, sturdy, and comfortable.
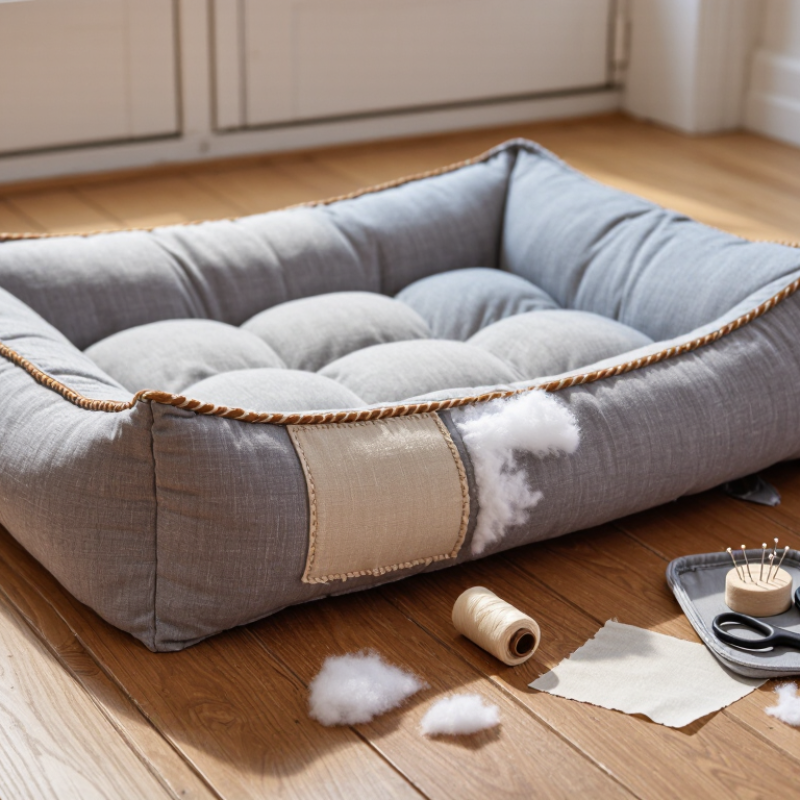
Before repairing a ripped pet bed, inspect the damage in bright light. A split along a seam may need a different fix than a tear through the middle of a panel. Check whether the fabric feels thin, whether the tear has frayed edges, and whether the filling is exposed. Keep your pet away from loose stuffing or damaged areas until the bed is repaired.
ASTM D5034 is a grab test for measuring fabric breaking strength, not a direct test of tear resistance. In a laboratory, fabric is held in specified grips and pulled until it breaks. The result can help compare a patch material with the bed’s fabric, especially when both were tested in similar directions and conditions. A higher breaking-strength value may be useful, but it does not guarantee a durable repair. Fabric construction, age, and stitching matter too.
For a small tear, choose a closely woven patch that extends well beyond the damaged edges. Check any available test data rather than relying only on fiber names or how thick the cloth feels. I would not trust a quick hand-pull as a substitute for ASTM testing; it is too inconsistent. Still, gently checking the fabric around the tear can reveal weak spots. I have learned that the neatest-looking patch is not always the strongest one.
| Tear or damage | What to assess | Suitable repair approach | Fabric-strength considerations | Safety and care checks |
|---|---|---|---|---|
| Small seam opening; fabric is otherwise intact | Check whether the surrounding cloth is frayed, thin, or pulling away from the seam. | Turn the cover inside out and resew the seam with a suitable needle and strong thread. Reinforce beyond the damaged section. | A seam repair may work well when the cloth next to the seam remains sound; stitching cannot restore weakened fabric. | Remove loose thread ends and check the repair regularly for new gaps. |
| Straight tear in a woven cover | Look for fraying and confirm there is enough intact fabric around the tear to support stitches. | Place a fabric patch behind or over the tear and sew around its edges; a zigzag stitch can help secure fraying edges. | Choose a patch fabric of similar or greater weight, and avoid stitching so close to a weak edge that it may pull through. | Use a washable patch and thread if the cover will be laundered; follow the cover’s care instructions. |
| Small hole or localized abrasion | Check whether the fabric is thin beyond the visible hole and whether the opening may expose filling. | Sew on a rounded patch that extends onto intact cloth around the damaged area. | A patch spreads the load across a wider area, but the result depends on the condition of the underlying cover and the stitching. | Keep pets away while sewing and remove pins, needles, and scraps before returning the bed. |
| Tear in fabric that can tolerate heat | Check the care label and patch instructions to confirm the fabric can withstand the required heat. | A fusible fabric patch may be used as directed; sewing around the patch can add mechanical support when appropriate. | Adhesive bonding varies by fabric, surface, and laundering; it is not a substitute for checking the fabric’s condition. | Do not apply heat to heat-sensitive materials, coatings, or foam. Let the repair cool fully before use. |
| Tear in fabric that should not be sewn or heated | Identify the fabric and check whether the repair product is explicitly suitable for it. | Use a fabric adhesive only if its label allows use on that material and the repaired area can be kept unused while it cures. | Adhesives may not bond reliably to every coating or finish; follow product directions rather than assuming equal performance. | Keep the pet away during application and curing. Do not use the bed if residue remains tacky or accessible. |
| Broken zipper or damaged removable cover closure | Check whether the slider, teeth, or surrounding fabric is damaged and whether the cover can be removed safely. | Replace the zipper or have the closure repaired; a temporary sewn closure may be suitable if it remains secure and safe. | If the fabric around the zipper is torn or weak, reinforce that area rather than replacing only the zipper component. | Ensure the pet cannot reach zipper parts, sharp edges, or loose hardware. |
| Large tear, repeated tearing, or broadly weakened fabric | Inspect the whole cover for thinning, multiple holes, damaged seams, and exposed or contaminated filling. | Replace the cover or bed if a secure repair is not practical; a large patch is an option only when it can be firmly attached to sound fabric. | A single repair cannot make extensively worn material uniformly strong again. | Do not use a bed with accessible filling, loose pieces, or damage that could create a chewing or swallowing hazard. |
About ASTM D5034: ASTM D5034 is a grab test method for measuring breaking strength and elongation of textile fabrics under specified test conditions. It can help compare fabric strength when samples are tested consistently, but it is not a pet-bed repair standard and does not measure tear propagation, seam strength, patch adhesion, or the safety of a finished repair. The guidance above is practical and qualitative, not laboratory test data; follow the fabric and repair-product care instructions.
Inspect the tear in bright light. Look for frayed edges, thin fabric, exposed filling, and damage along nearby seams. Keep pets away until the bed is repaired.
No. It measures fabric breaking strength in a laboratory. The results can help compare fabrics, but they do not predict whether a repair will last.
Use tightly woven fabric with a similar weight to the bed cover. Make the patch extend onto sound fabric, and round its corners to reduce snagging. A thick-feeling fabric is not always stronger.
A balanced lockstitch and two parallel rows can spread stress. Keep stitches secure, but avoid making so many holes that the fabric weakens. Test it gently.
It classifies stitch and seam constructions. It offers guidance, not a pet-bed repair recipe. ASTM D1683/D1683M also highlights the importance of seam strength.
Corners take repeated strain. Add an underside patch that extends beyond the worn area, then stitch around its edges. The repair may look uneven.
Yes, if it has split. Move the filling away, close the opening with small stitches, and secure loose thread ends inside. No stuffing should show.
Pull gently by hand and look for puckering, broken threads, or gaps. Press along the repair to feel for lumps. Recheck it after a few days; I might miss a weak spot at first.
A torn pet bed does not always need to be replaced. Start by examining the tear, the surrounding fabric, and the bed’s stress points to decide whether the damage can be repaired safely. ASTM D5034 provides a framework for assessing fabric strength, which can help you judge whether the material is likely to hold a patch and renewed stitching. Before sewing, remove the cover if possible, wash it according to its care instructions, and let it dry completely so dirt and moisture are not trapped in the repair.
To learn how to fix a ripped pet bed instead of throwing it away, choose a durable patch fabric and stitching suited to the bed’s material, using ASTM D6193 seam guidance as a reference. Mend the tear, reinforce areas that bear extra strain, and check that the inner liner is secured so filling cannot escape. A careful repair can extend the bed’s useful life and reduce household textile waste. The EPA reported that 17 million U.S. tons of textiles were generated in 2018, making repair a practical way to avoid discarding items that may still be usable.

 Wilsons Pets